Menu
Try our demo code to see how InGo works. InGo has four widgets, all detailed below with short descriptions, suggested placement in your registration flow and code samples below.
Embed the widgets in your registration flow as follows.
Important:
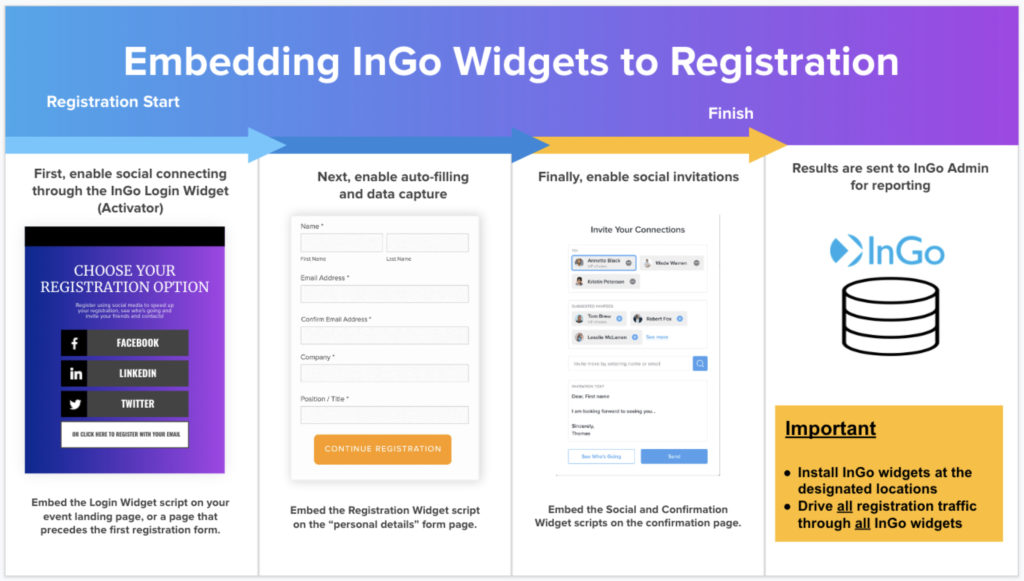
Place on the start of your Registration between the Body tags. This allows your attendees to register socially for your event.
					<script src="https://cdn.ingo.me/widgets/MG33J3I53HG01PKCG3UYURHDUWP3LPU2.js"
data-ingo-manual="http://www.insert_your_next_page_where_users_should_land.com"></script>


Place on the same page where your Page 2/Personal Details Page Form resides. This allows your attendees to register socially for your event.
<script src="https://cdn.ingo.me/widgets/BI2KQI0YB232JWPDWEJJHFBLUL4HHCTC.js"></script>
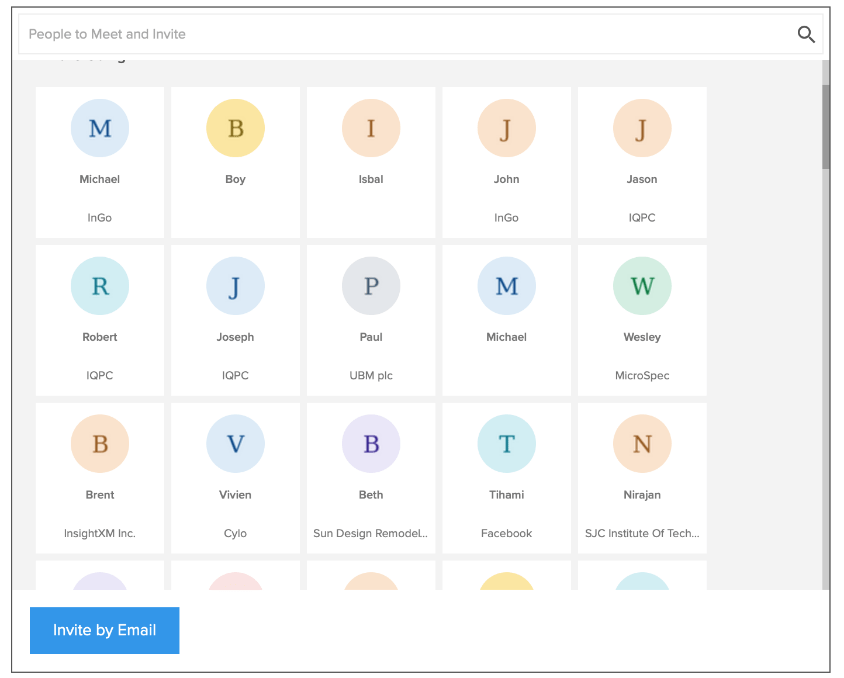
Place on your Confirmation Page in the Registration flow. This allows your attendees to invite the best of their network and allows InGo to pre-select the most socially-relevant contacts.
					<script src="https://cdn.ingo.me/widgets/D888951C590647F4B06785399E59565E.js">
</script>
Place on your Confirmation Page. This allows your attendees to be confirmed in your registration platform and in InGo’s reporting.
					<script src="https://cdn.ingo.me/widgets/HSJUKXQNJ3DIEYBVSHA4TD0U0MVWY2IE.js"
data-ingo-attendee.email="email_for_registrant"
data-ingo-attendee.first-name="firstname_system_parameter"
data-ingo-attendee.last-name="lastname_system_parameter"
data-ingo-attendee.company="company_name_system_parameter"
data-ingo-attendee.title="title/position_system_parameter"
data-ingo-attendee.external-registration-id="external_registration_ID_parameter">
</script>
© 2024, InGo, Inc.